
FAQ - V-Com SystemSuite
|
Document number: faqSS-01
Copyright (c) 2006 1stWorks Corporation. All rights reserved. |
V-Com System Suite
including NetDefense, GhostSurf
This discussion is based on SystemSuite Pro 6.
SystemSuite includes several security and privacy tools that need to be configured correctly for hotComm:
| Tool | Description | What to do |
| NetDefense Firewall | Firewall product | Tell it to Allow hotComm Server/Client to access the Internet always. See NetDefense, below. |
| Anti-Virus AutoEmail Scan | Online email scans | Disable POP3 mail scanning. See POP3 Email Scan, below. |
| GhostSurf | Privacy protection | 1. Create exceptions for ezpeer.net and hotcomm.com.
2. Also, allow Referer headers. See GhostSurf, below. |
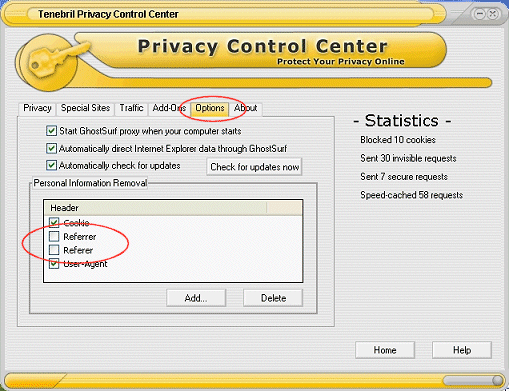
Referer Error: If you get a "Referer Error" message when you try to connect to a hotComm room, you must uncheck the Referer and Referrer boxes in the GhostSurf Options tab. See GhostSurf.
If you are running System Suite, you may see these icons in the lower right corner of your Windows taskbar:
|
|
NetDefense |
|
If you did not allow access, you can change the setting yourself.
- NetDefense challenge
When NetDefense asks you: "hotComm Server/Client is trying to connect to site. Do you want to allow this program to access the network?", check Remember my answer and click Yes.


- Changing the setting
If hotComm has already been blocked by NetDefense, you can reset it:
- Open SystemSuite (double-click the SystemSuite icon).
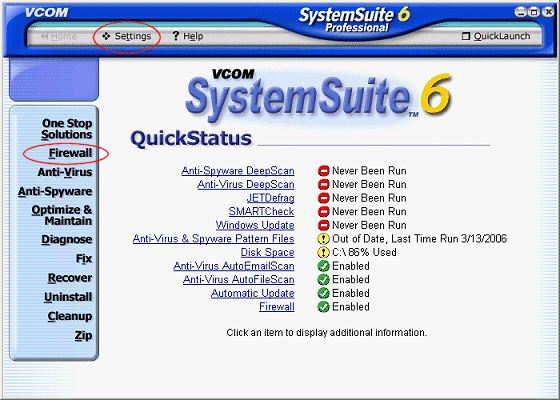
- Click Firewall in the left navigation column, and then click Settings on the top.
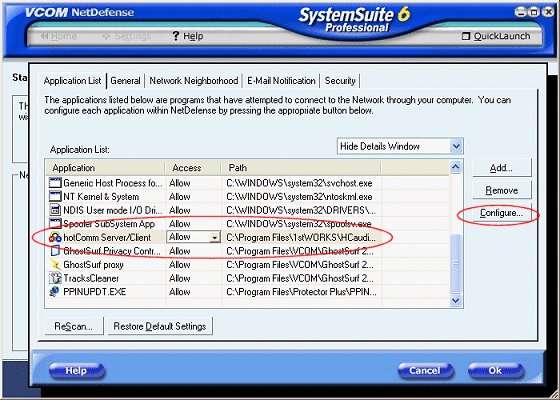
- Select the Application List tab. Click on hotComm Server/Client in the list of applications and then click Configure. (To sort by application name, click the Application column heading.)
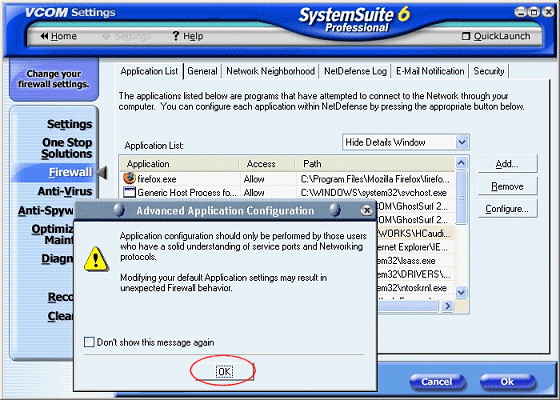
If you see the Advanced Application Configuration warning, click OK.
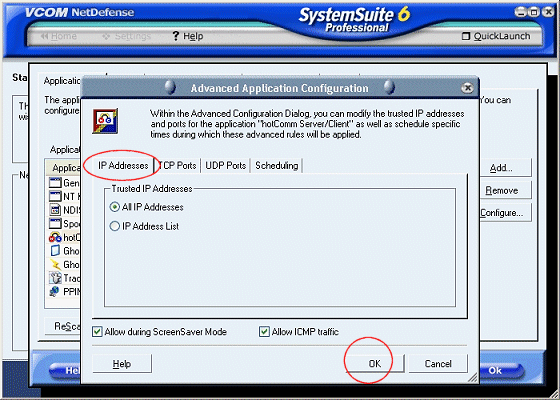
- Select the IP Addresses tab. Select All IP Addresses.
- Select the TCP Ports tab.
Under Trusted Local Ports, check Act as Server and select All TCP Ports. Under Trusted Remote Ports, check Act as Client and select All TCP Ports. 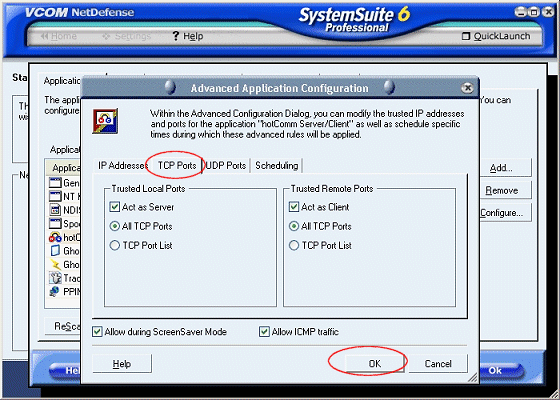
- Optional. Select the UDP Ports tab.
Under Trusted Local Ports, check Act as Server and select All UDP Ports. Under Trusted Remote Ports, check Act as Client and select All UDP Ports. 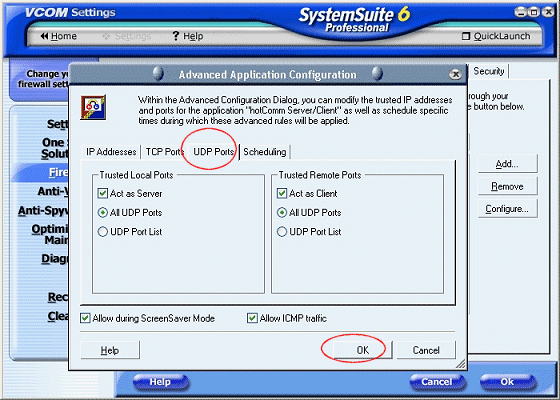
- Click OK to close the Configuration window, and click OK again to close the SystemSuite window.
- Open SystemSuite (double-click the SystemSuite icon).
At this point, hotComm will probably seem to be online*, but you may not be able to connect to rooms. If you cannot connect to a room, disable POP3 Email scanning. See POP3 AutoEmail Scan, following.
* the headset icon is red-and-blue, the message on the bottom line of your hotComm window says "Online", and if you are using hotComm Standard/Pro, the relay icons may be green.
POP3 AutoEmail Scan |
|
If hotComm seems to be online but you are unable to connect to rooms, disable the POP3 AutoEmail Scan.
- Open SystemSuite (double-click the SystemSuite icon).
- Click Anti-Virus in the left navigation column, and then click Settings on the top.
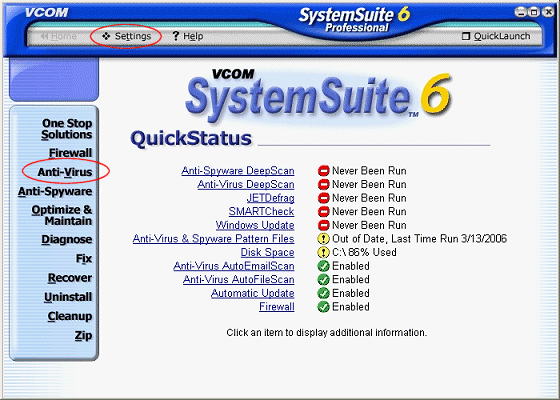
- Click Auto-Email Scan and then Advanced.
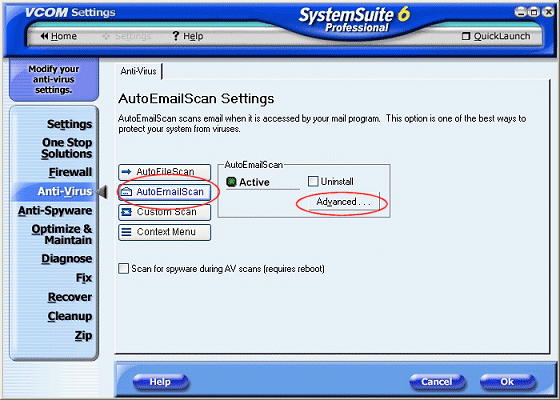
- Un-check the POP3 Scan and click OK.
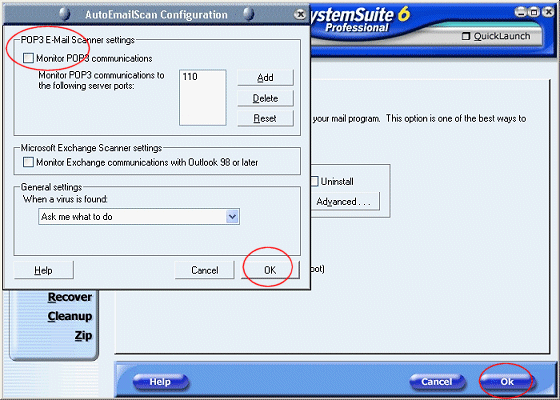
- Click OK again, and then close the SystemSuite window.
GhostSurf |
|
- Open GhostSurf Privacy Control (right-click the GhostSurf icon and select Open Privacy Control Center).
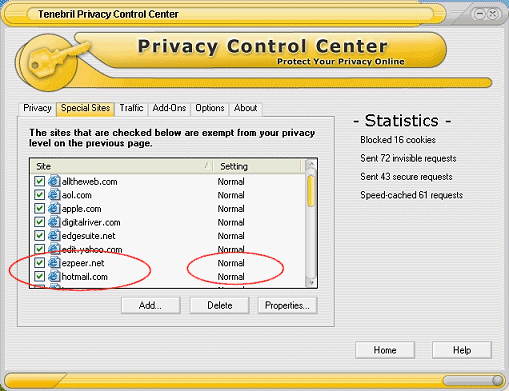
- Select the Special Sites tab.
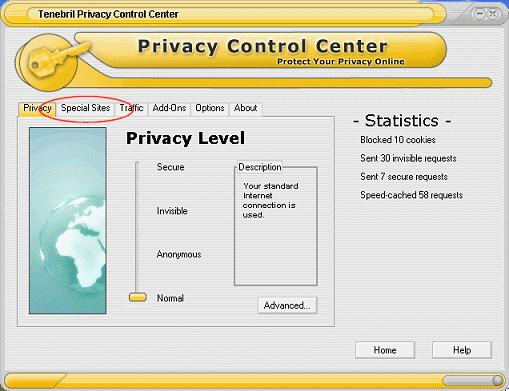
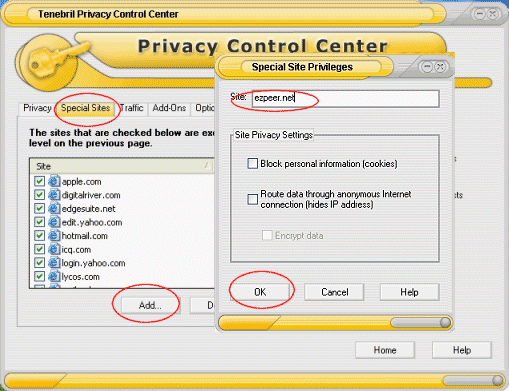
- Click Add. Then, in the Special Site Privileges window, type: ezpeer.net and click OK.
Click Add again. Then, in the Special Site Privileges window, type: hotcomm.com and click OK.
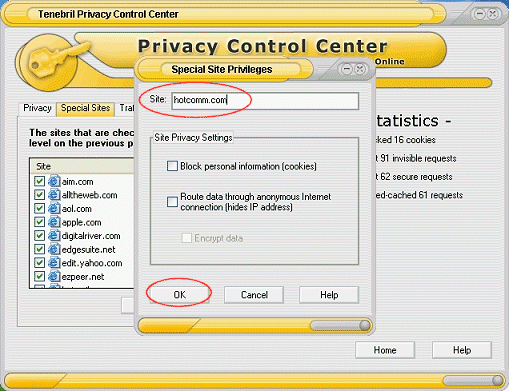
Check the Site list, and make sure that ezpeer.net and hotcomm.com are both set to Normal. If not, click Properties to edit the setting.
- Select the Options tab. Uncheck the Referer and Referrer boxes.
Note: this is required for some rooms, but not all rooms. If you get a "Referer Error" message when you try to connect to a room, then you must uncheck these options.
- Close the GhostSurf window.