
Step-by-Step: hotComm Standard/Pro Registration
|
Document number: HCR.01
Copyright (c) 2003 1stWorks Corporation. All rights reserved. |
This document shows example hotComm Standard/Pro registration screens.
Registration Screens
Unique email address required: Do not register the same email address more than once, even if you have uninstalled and are now reinstalling, or if you are trying to move hotComm to another computer. Use a different email address, or contact 1stWorks Support.
Second computer: Do not register a second computer if you plan to share the license between two computers (such as your home and office computers). See 1 License, 2 Computers.
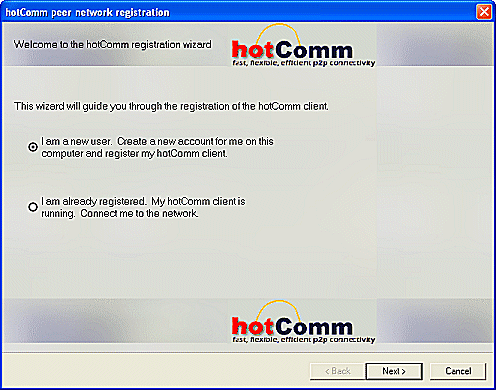
- Welcome: Click Next if you are a new user. Otherwise, click Exit.
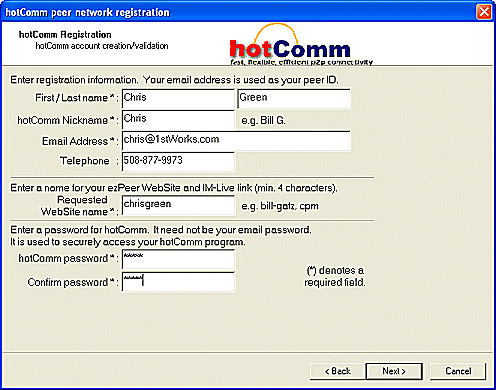
- Account creation/validation: Enter the information and click Next.
- First and last name: enter your name.
- Nickname: this is your identity name, which others see.
- Email address: register any email address only once.
- Telephone: enter your telephone.
- Password: enter a password of your choice and confirm it.
- Website: choose a name you like. (This becomes part of a standard web address for accessing certain pages on your computer, and people can call into you using this address. The full addresses are: your-website.ezpeer.net and your-website.im-live.com/im-live/. See IM-Live and ezPeer in the online User Guide.)
The Next button turns black when all information has been filled in and your two password entries match.
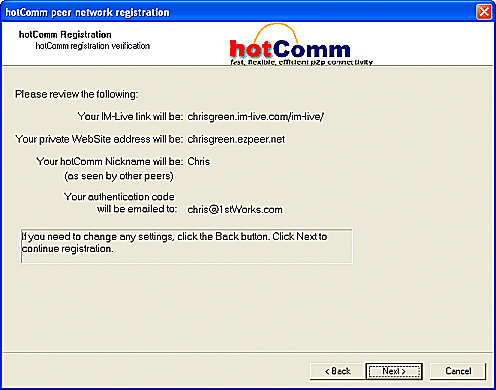
- Registration verification: review, and click Next.
- Registration Activation Key
As of the 7.20 revision, hotComm Standard/Pro no longer requires that you type in an 44-character activation key. Activation is automatic. You may receive an email with an 44-character activation key, but you can disregard it.
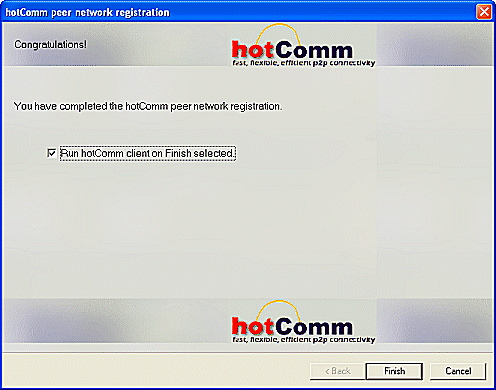
- Finish: Click Finish. hotComm starts automatically after registration.
Next step: hotComm Startup Screens.
Return to How to Install hotComm Standard/Pro
Top